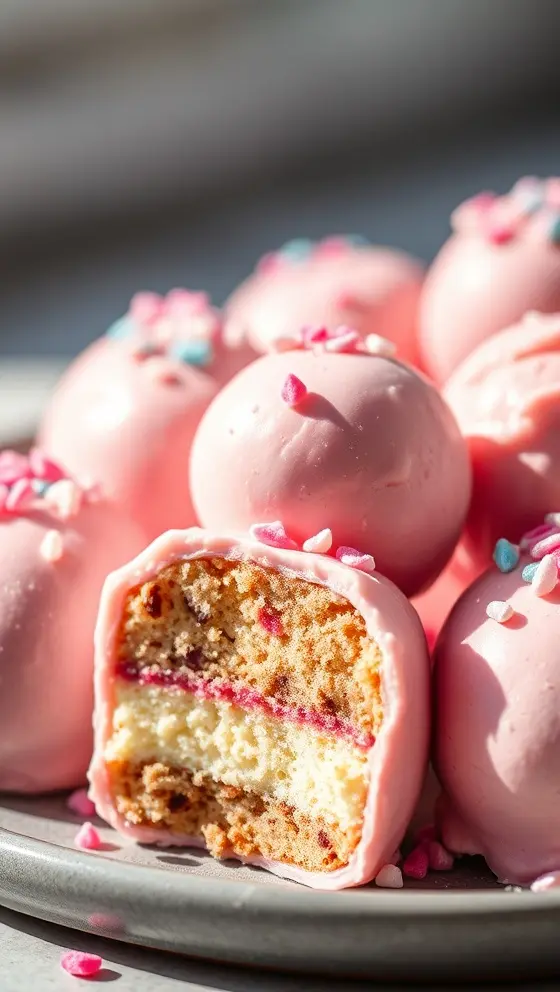

Butterfinger Balls
Introduction
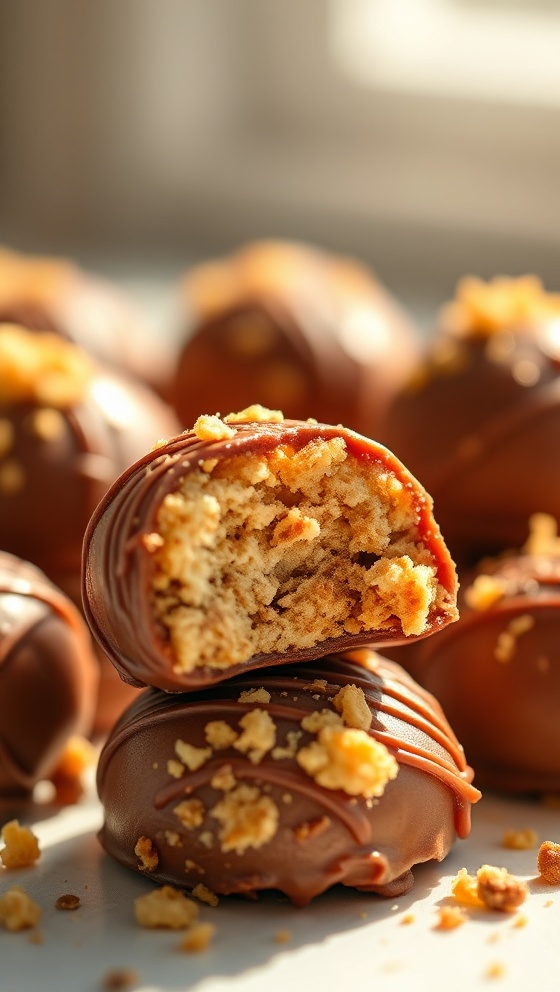
If you’re looking for a delicious and easy-to-make treat that will impress your friends and family, Butterfinger Balls are a fantastic choice. These no-bake snacks combine the delightful crunch of crushed Butterfinger candies with creamy peanut butter and a sweet coating, creating a gourmet experience that’s simple enough for anyone to prepare. Not only are they perfect for parties, holidays, or a cozy night in, but they also make for a delightful edible gift. In this post, you will find everything you need to create these mouthwatering Butterfinger Balls from scratch, including a detailed ingredients list, timing, step-by-step instructions, and a plethora of tips to make your cooking experience seamless.
Ingredients List
To make Butterfinger Balls, you’ll need:
– 1 cup of crushed Butterfinger candies
– 1 cup of creamy peanut butter
– 2 cups of powdered sugar
– 1 teaspoon of vanilla extract
– 1 cup of chocolate chips (for coating)
– 1 tablespoon of shortening (optional, for the chocolate coating)
With these simple ingredients, you can create fantastic Butterfinger Balls that everyone will love.
Timing
Preparation Time: 15 minutes
Chill Time: 30 minutes
Total Time: 45 minutes
This recipe is incredibly efficient, allowing you to whip up a batch of these indulgent treats in just under an hour, making it perfect for unexpected guests or last-minute gatherings.
Step-by-Step Instructions
1. In a mixing bowl, combine the crushed Butterfinger candies and peanut butter. Stir the mixture until it is well-blended and the candies are evenly distributed.
2. Add the powdered sugar and vanilla extract to the bowl and mix until the ingredients come together to form a sticky dough.
3. Using your hands, roll the mixture into small balls, about 1 inch in diameter.
4. Place the rolled balls onto a parchment-lined baking sheet.
5. Once all the mixture is rolled into balls, place the tray in the refrigerator for at least 30 minutes to firm up.
6. While the balls are chilling, melt the chocolate chips in a microwave-safe bowl. Microwave in 30-second intervals, stirring in between, until the chocolate is smooth and fully melted. If desired, add shortening to the chocolate to achieve a smoother texture.
7. Remove the chilled Butterfinger Balls from the refrigerator. Using a fork or a skewer, dip each ball into the melted chocolate, allowing excess chocolate to drip off before placing it back onto the baking sheet.
8. Once all the balls are coated, return them to the refrigerator for an additional 15 minutes until the chocolate has hardened.
9. Once the chocolate is set, you can serve your delicious Butterfinger Balls to your guests.
These step-by-step instructions ensure that you’ll achieve the perfect Butterfinger Balls with minimal hassle!
Nutritional Information
For each Butterfinger Ball (assuming recipe yields approx. 24 balls):
– Calories: 110
– Total Fat: 5g
– Saturated Fat: 2.5g
– Cholesterol: 1mg
– Sodium: 25mg
– Total Carbohydrates: 14g
– Dietary Fiber: 0g
– Sugars: 10g
– Protein: 2g
While these treats are by no means health food, they are perfect for indulgent moments. Moderation is key, especially when you’re enjoying something as delightful as Butterfinger Balls.
Tips
To make sure your Butterfinger Balls turn out perfectly, consider the following tips:
– For an extra crunchy texture, add a handful of crushed peanuts or chopped pretzels to the mixture.
– If you’re unsure about rolling the mixture, you can refrigerate the peanut butter mixture for a few minutes before rolling to ensure it’s less sticky.
– Experiment with different types of chocolate for coating, such as milk chocolate or white chocolate, to create unique flavor combinations.
– If you’re a fan of sea salt, sprinkle a bit on top of the chocolate coating before it sets for an added flavor enhancement.
Alternative Methods
Besides the traditional method, you can try a few different takes on Butterfinger Balls:
1. Butterfinger Bark: Instead of rolling into balls, spread the mixture onto a parchment-lined baking dish and freeze it. Once set, cut it into small squares for a different presentation.
2. Variations in Nuts: Switch out the peanut butter for almond butter or sunflower seed butter for a nut-free option.
3. Dipping Variations: Instead of melting chocolate, consider rolling the balls in chopped nuts or coconut flakes for an entirely different texture and taste.
Common Mistakes to Avoid
To achieve the best Butterfinger Balls, be aware of these common mistakes:
– Not Chilling the Mixture: Skipping the chilling step can make the balls too soft and difficult to work with.
– Under-melting the Chocolate: Ensure your chocolate is fully melted before dipping, as clumps can ruin the smooth coating.
– Crowding on the Baking Sheet: Give enough space between each ball on the baking sheet to prevent them from sticking together.
By avoiding these pitfalls, you’ll be well on your way to impressing everyone with your Butterfinger Balls.
Conclusion
Butterfinger Balls are an incredible treat that pairs nostalgic flavors with an easy-to-make recipe, perfect for any occasion. Their crunchy, peanut buttery goodness makes them irresistible. Whether you’re hosting a party or simply want to satisfy your sweet tooth, these delights are sure to bring smiles. Remember, the key to perfecting this recipe lies in following the steps precisely and allowing for proper chilling time for the best texture. Give these Butterfinger Balls a try, and don’t hesitate to check back on my website for more delectable recipes that will inspire your culinary adventures.
FAQs
1. Can I make Butterfinger Balls in advance?
Absolutely! These treats can be made a day or two in advance and stored in the fridge.
2. How long do Butterfinger Balls last?
If stored properly in an airtight container, they can last up to a week in the refrigerator.
3. Can I freeze Butterfinger Balls?
Yes, you can freeze them for up to three months. Just ensure they are sealed tightly to prevent freezer burn.
4. What can I substitute for Butterfinger candy?
If you’re unable to find Butterfinger, you can use a different brand of chocolate-covered peanut butter candy as a substitute.
5. Are there any gluten-free options?
Yes, if you use gluten-free chocolate and ensure all your ingredients are certified gluten-free, this recipe can accommodate gluten-free diets.
Now, go ahead and bring some joy into your kitchen by making these delightful Butterfinger Balls! Be sure to come back to my website regularly for new recipes that will enhance your culinary repertoire.
Butterfinger Balls
Ingredients
- 1 cup crushed Butterfinger candy bars
- 1 cup creamy peanut butter
- 2 cups powdered sugar
- 2 cups chocolate chips
- 1 tablespoon coconut oil
Instructions
- In a mixing bowl, combine crushed Butterfinger bars, peanut butter, and powdered sugar until well mixed.
- Form the mixture into small balls and place them on a baking sheet lined with parchment paper.
- In a microwave-safe bowl, melt chocolate chips and coconut oil together until smooth.
- Dip each ball into the melted chocolate and return to the baking sheet.
- Chill in the refrigerator until the chocolate is set, about 30 minutes.
Nutrition Information
- Calories: 150 kcal
- Protein: 3g