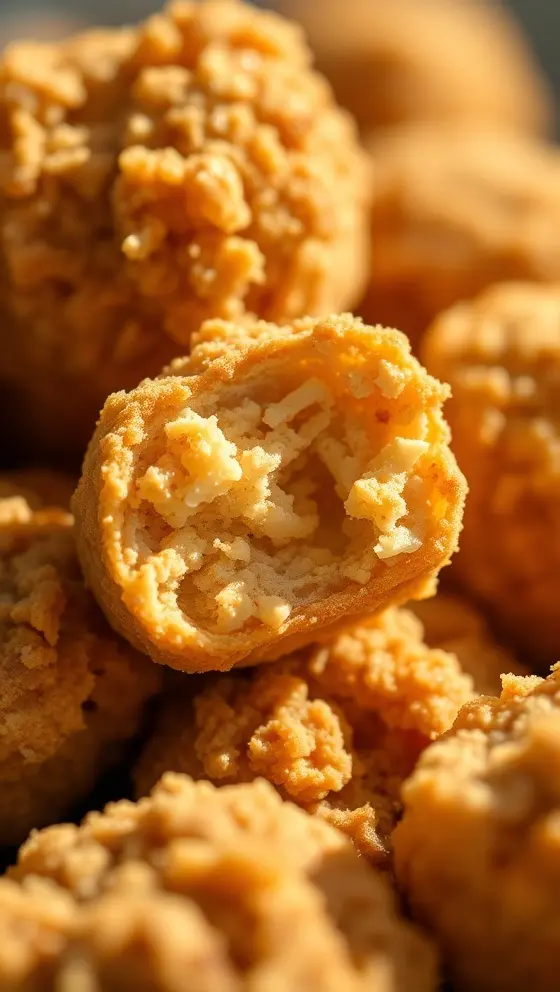

No-Bake Butterfinger Balls
Introduction
If you’re looking for a decadent dessert that requires minimal effort, then No-Bake Butterfinger Balls are the perfect treat for you. These delightful little bites combine the delicious flavors of crushed Butterfinger bars, creamy peanut butter, and a rich chocolate coating, making them an irresistible snack for any occasion. Whether it’s a last-minute party treat, a sweet addition to your holiday platters, or simply a reward for yourself after a long week, this no-bake recipe is sure to become a favorite in your household. Join me in this culinary journey as we prepare these delightful No-Bake Butterfinger Balls together.
Ingredients List
To create No-Bake Butterfinger Balls, you will need to gather the following ingredients:
– 1 cup of crushed Butterfinger candy bars (approximately 4 full-sized bars)
– 2 cups of powdered sugar
– 1 cup of creamy peanut butter
– 1 teaspoon of vanilla extract
– 1 cup of semi-sweet chocolate chips (for coating)
– 2 tablespoons of coconut oil (optional for smoothness)
With these simple ingredients, you can create a crowd-pleasing dessert that’s both sweet and satisfying.
Timing
Prepare yourself for a quick and straightforward cooking experience! Here’s the estimated timing for your No-Bake Butterfinger Balls:
– Preparation Time: 15 minutes
– Chilling Time: 30 minutes
– Total Time: 45 minutes
This means you can whip up these irresistible treats in less than an hour—perfect for those spontaneous gatherings!
Step-by-Step Instructions
Now that you have your ingredients and timing figured out, let’s dive into the step-by-step instructions for making No-Bake Butterfinger Balls. Follow these simple steps to ensure your treats are a success:
1. Crush the Butterfingers: Start by unwrapping the Butterfinger bars and placing them in a resealable plastic bag. Using a rolling pin or a heavy object, crush the bars into small pieces, leaving some larger chunks to provide texture.
2. Mix the Base: In a large mixing bowl, combine the crushed Butterfinger, powdered sugar, peanut butter, and vanilla extract. Use a spatula or your hands to mix the ingredients until they form a homogeneous dough.
3. Shape the Balls: Once the mixture is well combined, take small portions (about 1-2 tablespoons) and roll them into balls. Place them onto a parchment-lined baking sheet.
4. Chill the Balls: Once all the butterfinger balls are shaped, place the baking sheet in the refrigerator for 30 minutes. This step is crucial for helping the balls firm up before coating.
5. Prepare the Chocolate Coating: While the balls chill, melt the semi-sweet chocolate chips with coconut oil in a microwave-safe bowl. Heat in 30-second intervals, stirring in between, until smooth and fully melted.
6. Coat the Balls: Remove the chilled Butterfinger balls from the refrigerator. Dip each ball into the melted chocolate, making sure to coat them evenly. Use a fork to remove excess chocolate before placing them back on the baking sheet.
7. Set the Coating: Allow the chocolate to set by placing the baking sheet back in the fridge for another 15-20 minutes. Once the chocolate is hardened, your no-bake Butterfinger balls will be ready to enjoy!
Nutritional Information
Understanding the nutritional value of your treats is essential, especially if you’re sharing them with family and friends. Here’s a basic nutritional breakdown for one No-Bake Butterfinger Ball (based on 12 servings):
– Calories: 200
– Total Fat: 11g
– Saturated Fat: 4g
– Cholesterol: 0mg
– Sodium: 60mg
– Total Carbohydrate: 24g
– Dietary Fiber: 1g
– Sugars: 18g
– Protein: 3g
These numbers can vary depending on the specific brands of ingredients used. Enjoy in moderation!
Tips
To enhance your experience while making No-Bake Butterfinger Balls, consider these helpful tips:
– Chilling Time: Don’t shortcut the chilling time. Proper chilling makes it easier to shape and coat the balls without them falling apart.
– Experiment with Toppings: Enhance the visual appeal and flavor by sprinkling some crushed Butterfinger or chopped nuts on top before the chocolate sets.
– Use Quality Peanut Butter: Opt for high-quality creamy peanut butter for the best flavor and texture. Natural peanut butter works well too, just be sure to mix it well before use.
– Room Temperature Ingredients: Let your peanut butter come to room temperature if it’s too cold from the fridge, making it easier to mix with the other ingredients.
Alternative Methods
If you want to shake things up a bit, here are a few alternative methods you could employ while making No-Bake Butterfinger Balls:
– Add Flavors: Stir in a dash of cinnamon or a hint of sea salt to enhance flavors. Chocolate and peanut butter pair beautifully with warm spices.
– Use Different Coatings: Instead of semi-sweet chocolate, try white chocolate or dark chocolate for a unique touch. You can even drizzle contrasting chocolate on top for decoration.
– Make Them Vegan: Swap the peanut butter for almond or cashew butter, use dairy-free chocolate chips, and replace the powdered sugar with coconut or almond flour to create a vegan version.
– Consider a Rice Krispies Twist: Mix in some Rice Krispies or chopped pretzels for an added crunch and a delightful twist to the traditional recipe.
Common Mistakes to Avoid
To ensure your No-Bake Butterfinger Balls turn out perfectly every time, keep these common mistakes in mind and be sure to avoid them:
– Not Chilling Long Enough: If you don’t chill the dough long enough, your balls will be too sticky or too soft to shape properly.
– Over-Melting the Chocolate: Heat your chocolate in intervals and stir often. Overheating can cause the chocolate to seize.
– Ignoring Texture: If your dough feels too dry, consider adding a bit more peanut butter. If it’s too wet, add a bit more powdered sugar until a workable dough forms.
– Skipping the Parchment Paper: Always line your baking sheet with parchment paper. This will prevent the Butterfinger balls from sticking and make for easy cleanup.
Conclusion
No-Bake Butterfinger Balls are a delightful treat that’s incredibly easy to make, allowing you to satisfy your sweet tooth without spending hours in the kitchen. These sweet morsels bring together the mouth-watering flavors of Butterfinger and peanut butter, all coated in a luscious layer of chocolate. Now that you have the complete recipe at your fingertips, it’s time to get creative in the kitchen and whip up your batch of No-Bake Butterfinger Balls! Make sure to return to my website for more fun and delicious recipes that will inspire your cooking adventures.
FAQs
Q: How do I store No-Bake Butterfinger Balls?
A: Store your No-Bake Butterfinger Balls in an airtight container in the refrigerator for up to one week. For longer storage, you can freeze them for up to three months.
Q: Can I use crunchy peanut butter instead of creamy?
A: Absolutely! Crunchy peanut butter can add an interesting texture and flavor to the balls.
Q: Are there any nut-free options?
A: Yes! You can substitute peanut butter with sun butter or soy nut butter to make a nut-free version of this recipe.
Q: Can I make these with my kids?
A: Certainly! This recipe is a fun and engaging way to involve kids in the kitchen, especially during the rolling and dipping phases.
By making these No-Bake Butterfinger Balls, you’re not just whipping up a treat; you’re creating a memorable experience. So, grab your ingredients, gather your loved ones, and start creating delicious moments today! Don’t forget to check back for more delightful recipes that you’ll want to share with family and friends. Happy cooking!
No-Bake Butterfinger Balls

Ingredients
- 1 cup crushed Butterfinger candy bars
- 1 cup creamy peanut butter
- 2 cups powdered sugar
- 1 cup chocolate chips
- 1 tablespoon coconut oil
Instructions
- In a bowl, mix crushed Butterfinger bars and peanut butter until well combined.
- Add powdered sugar gradually, mixing until a dough forms.
- Roll the mixture into small balls and place them on a baking sheet.
- Melt chocolate chips and coconut oil together in a microwave-safe bowl.
- Dip each ball into the melted chocolate and return to the baking sheet.
- Chill in the refrigerator until set, about 30 minutes.
Nutrition Information
- Calories: 150 kcal
- Protein: 3g