
Spider Peanut Butter Cookies
Introduction
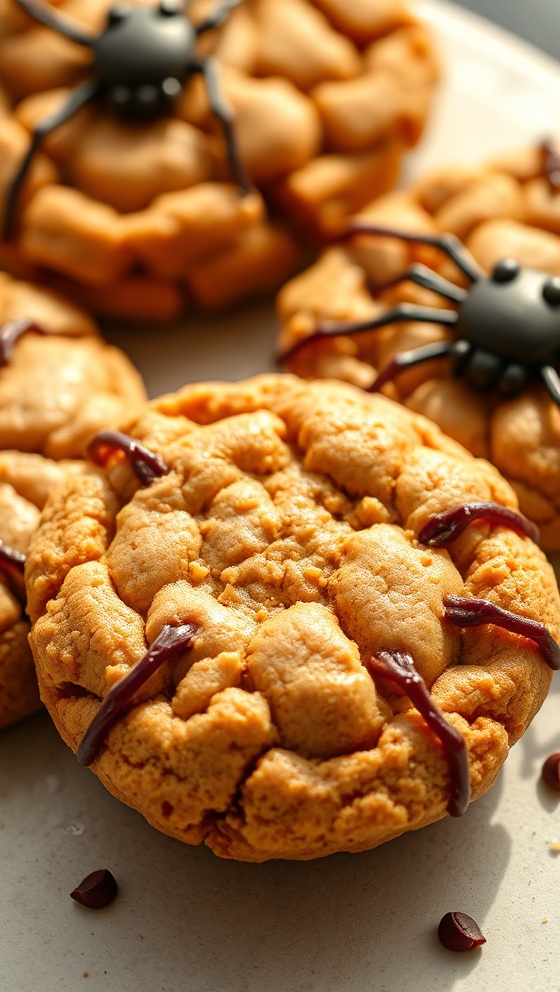
If you’re looking for a nostalgic treat that combines the irresistible flavors of peanut butter and chocolate, look no further. Spider Peanut Butter Cookies truly encapsulate that delightful blend that many have loved since childhood. These cookies are perfect for family gatherings, holiday cookie exchanges, or simply a cozy night in with a glass of milk. With their unique spider-web design, these cookies are not only delicious but also visually stunning, making them a perfect addition to any dessert table. In this post, we will explore how to create these delectable treats step-by-step while making sure you understand every nuance of the technique involved.
Ingredients List
To bring your spider peanut butter cookies to life, you’ll need the following ingredients:
– 1 cup creamy peanut butter
– 1 cup granulated sugar
– 1 large egg
– 1 teaspoon vanilla extract
– 1 teaspoon baking soda
– ½ cup semi-sweet chocolate chips
– A pinch of salt
These ingredients are commonplace and easy to find. Make sure you have everything prepared before starting your baking journey!
Timing
Preparation doesn’t take long, and the reward is worth every second. Here’s a breakdown of the timing:
– Preparation Time: 10 minutes
– Cooking Time: 10-12 minutes
– Cooling Time: 5 minutes
– Total Time: Approximately 25-30 minutes
Before diving into the cookie-making process, ensure you allocate enough time to enjoy the flavors fully!
Step-by-Step Instructions
Now let’s get into the heart of the matter: creating those outstanding spider peanut butter cookies. Following these step-by-step instructions will help you achieve the perfect batch.
1. Preheat your oven: Start by preheating the oven to 350 degrees Fahrenheit (175 degrees Celsius). This ensures that your cookies bake evenly.
2. Mix the ingredients: In a large mixing bowl, combine the creamy peanut butter, granulated sugar, egg, vanilla extract, baking soda, and salt. Stir until the mixture is smooth and well-combined. This is the foundation of your spider peanut butter cookies.
3. Shape the dough: Use a tablespoon to scoop out the dough and roll it into balls. Place these dough balls on a baking sheet lined with parchment paper, leaving about 2 inches of space between each.
4. Fork press method: Take a fork and press down on each dough ball, creating a crisscross pattern. This will help create the spider-like look once chocolate is added.
5. Melt the chocolate: In a microwave-safe bowl or over a double boiler, melt the semi-sweet chocolate chips until smooth. Be careful not to overheat as it can burn.
6. Create the spider web: Using a piping bag or a spoon, drizzle the melted chocolate in a circular spiral over each of the crisscrosses you’ve created earlier. This not only adds to the appearance but also enhances the flavor.
7. Bake: Place the baking sheet in the preheated oven and bake for 10-12 minutes until the edges are slightly browned.
8. Cool down: Once baked, remove the cookies from the oven and let them cool on the baking sheet for 5 minutes before moving them to a wire rack to cool completely.
9. Serve and enjoy: Once cooled, serve your spider peanut butter cookies alongside a refreshing glass of milk or a hot cup of coffee. Enjoy every bite!
Nutritional Information
Understanding the nutritional aspect can help you enjoy these spider peanut butter cookies without any guilt. Here’s a general overview per cookie:
– Calories: Approximately 150 calories
– Total Fat: 8g
– Saturated Fat: 2g
– Carbohydrates: 16g
– Sugar: 7g
– Protein: 4g
These cookies are a delightful treat that packs a protein punch courtesy of the peanut butter, making them a more wholesome choice compared to other cookies!
Tips
To ensure the best results while making your spider peanut butter cookies, consider these helpful tips:
– Use room temperature ingredients: This ensures a smooth blend and consistent texture.
– Check your oven thermometer: Oven temperatures can vary; make sure yours is accurately calibrated to avoid over- or under-baking.
– Experiment with ingredients: Feel free to mix in oatmeal or use chunky peanut butter for a different texture.
– Store properly: Keep these cookies in an airtight container to preserve their freshness for up to a week.
Alternative Methods
If you want to add a personal twist to your spider peanut butter cookies, here are some alternative methods you might consider:
– Peanut butter variations: Try using different types of nut butter, such as almond or cashew, for a unique flavor profile.
– Add-ins: Fold in ingredients like chopped nuts, shredded coconut, or mini marshmallows for extra texture.
– Alternative sweeteners: Substitute granulated sugar with honey, maple syrup, or a sugar alternative, but keep in mind that this might change the texture and baking time.
– Crispy edges: For a chewier cookie, slightly under-bake them to maintain a softer center.
Common Mistakes to Avoid
To achieve the best results, avoid these common pitfalls when making spider peanut butter cookies:
– Overmixing the dough: This can lead to tough cookies; mix until just combined.
– Not measuring accurately: Be precise with your ingredients, especially with flour and sugar, to maintain the proper balance.
– Skipping the cooling step: Cooling allows the essential flavors to develop and helps achieve the perfect texture.
– Using cold ingredients: This can lead to an uneven mixture, affecting the final product.
Conclusion
Baking spider peanut butter cookies is not just about satisfying a sweet tooth; it’s an experience filled with nostalgia and creativity. The combination of textures and flavors can evoke fond childhood memories while delighting your taste buds with each bite. Remember, whether you’re preparing them for a gathering or just for yourself, these cookies are sure to impress. Don’t forget to return to my website for more delightful recipes that will keep your kitchen buzzing with fantastic flavors!
FAQs
1. Can I freeze spider peanut butter cookies?
Yes, you can freeze the baked cookies. Be sure to store them in an airtight container, and they should last up to three months in the freezer.
2. Are spider peanut butter cookies gluten-free?
Yes, as long as you use gluten-free baking soda and ensure all other ingredients are gluten-free, these cookies can be a great gluten-free treat.
3. Can I make these cookies vegan?
You can substitute the egg with a flaxseed meal or a commercial egg replacer to make the recipe vegan-friendly.
4. How can I make my cookies softer?
To create softer cookies, slightly reduce the baking time and ensure not to overmix the dough.
5. What’s the best way to store leftovers?
Store them in an airtight container at room temperature for optimal freshness. They can last up to a week!
Explore the kitchen, unleash your creativity, and craft these delightful spider peanut butter cookies for yourself. You’ll not only enjoy the process but also get to savor the delightful results!
Spider Peanut Butter Cookies
Ingredients
- 1 cup peanut butter
- 1 cup sugar
- 1 egg
- 1 teaspoon vanilla extract
- 1/2 teaspoon baking soda
- 1/4 teaspoon salt
- Chocolate chips (optional)
Instructions
- Preheat the oven to 350°F (175°C).
- In a bowl, mix together peanut butter, sugar, egg, vanilla, baking soda, and salt until smooth.
- Drop spoonfuls of dough onto a baking sheet lined with parchment paper.
- Flatten each cookie with a fork, creating a crisscross pattern.
- Bake for 10 minutes or until edges are lightly golden.
- Let cool on the baking sheet for a few minutes before transferring to a wire rack.
Nutrition Information
- Calories: 100 kcal
- Protein: 3g